YRC LOGO  
   

User Guide

Searching For Data || View Experiment || Downloading Data

I. Searching For Data

A. Search Form

All searches in the YRC PIR begin with the same search form. This form is the default starting page for the site, and may be reached at any time by clicking the "Search" tab at the top of every page.

The form is used to define parameters for searching the experiments in the database. All matching experiments will be returned to the user on a search results page (described later). Note: By default, not specifying any additional parameters on the search form will return all results in the database.

The following is a description of the fields present on the search form:

i. Data source

Only experiments from the selected source of data will be included in the results.

ii. Include FRET experiments?

Should FRET experiments be included in the results? For information about FRET, please see the YRC FRET tutorial.
  1. No - FRET experiments will not be included
  2. Yes (Inclusively) - FRET experiments are included in results (in addition to non-FRET experiments)
  3. Yes (Exclusively) - Only FRET experiments will be included

iii. Number of channels

Only experiments that contain the specified number of channels will be included in the search results.

iv. Number of Z-sections

Only experiments that contain the specified number of Z-sections (number of focal planes) will be included in the search results.

v. Number of time series

Only experiments that contain the specified number of time series will be included in the search results. Time series are defined as the number of times the each channel was imaged at the same X and Y coordinates.

vi. Objective

The magnification power of the objective used to image the experiment.

vii. Binning

The binning that was applied to the image when it was captured by the camera. See the FAQ.

viii. Image size

The dimensions, in pixels, for the images captured in the experiment.

ix. Select protein

All matching experiments will include the protein selected by this option. To add a protein to the search, click the [Add Protein] link. A new window will appear allowing you to search for the protein that you wish to include in your image search:

Protein Search Popup

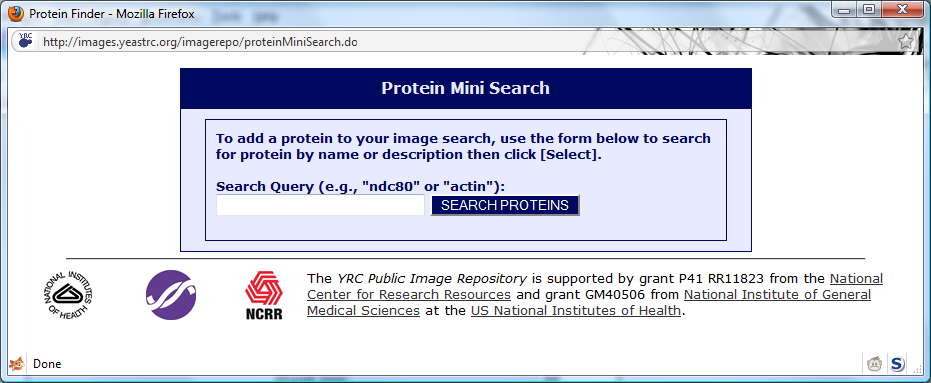
Entering the name or partial description of the protein will yield search results:

Protein Search Popup Results

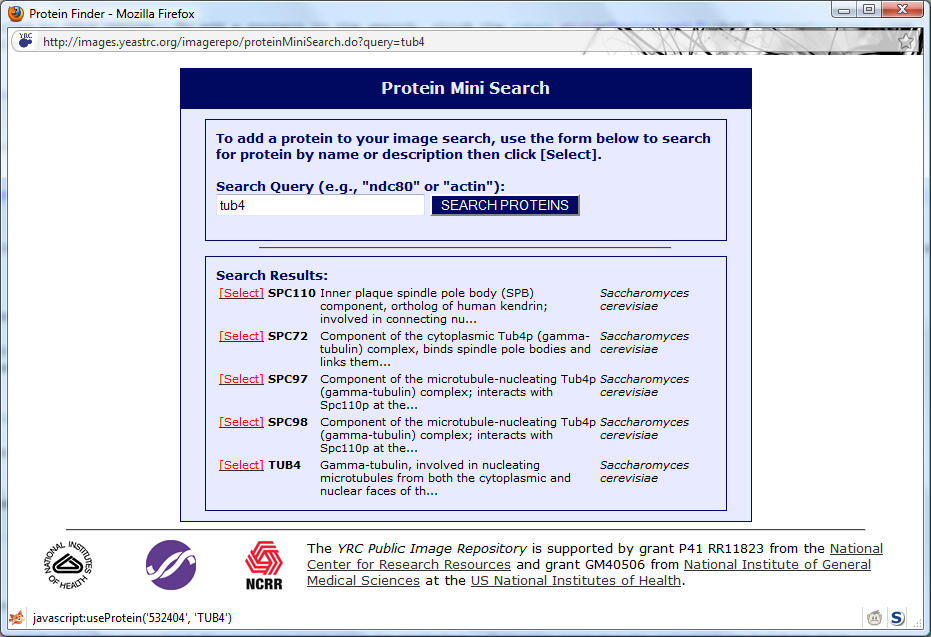
Once you have located your protein of interest, click the [Select] link next to the protein name, and that protein will be added to your search (and the search window will automatically close).

x. Select second protein

All matching experiments will include both this protein and the previously selected protein. This is provided as a means of finding colocalization experiments and FRET experiments containing specific pairs of proteins. The process of adding a second protein works exactly the same as the first protein, as described above.

xi. Species

All matching experiments will contain proteins from the selected species.

xii. Strain name

Only experiments imaging cells of the specified strain will be returned. These are strings used internally in the YRC PIR and are displayed in search results and in experiment view pages.

xiii. Limit to following fluorescent tags

Only experiments containing at least one protein tagged with one the specified flourescent tags will be included. Multiple tags may be selected by holding down control (in Windows or Linux) or command (on a Macintosh).

xiv. Gene Ontology

You may specify one or more Gene Ontology terms and all experiments returned will contain at least one protein annotated with any of the specified terms. To specify a term, click the [Use GO Searcher] link. A window will appear allowing you to search the Gene Ontology:

GO Search Popup

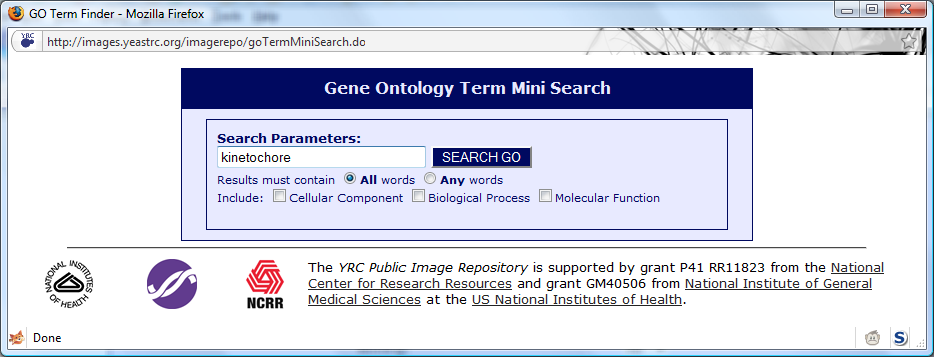
In the example, kinetochore was searched for. The search results appear as:
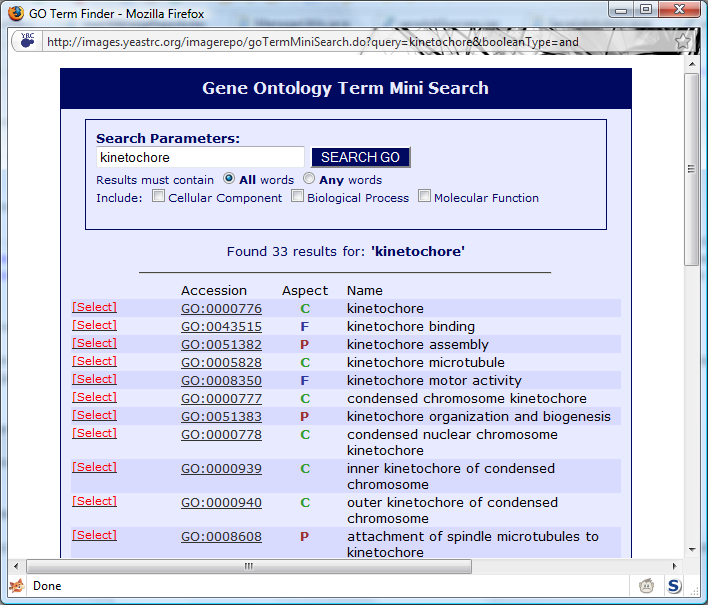


Clicking [Select] next to the desired GO term will add that GO term to the Image Repository search.

To add additional GO terms to the search, click the +Add Another GO Term link and repeat the above procedure. You may add up to 5 GO terms to your search.

B. Search Results

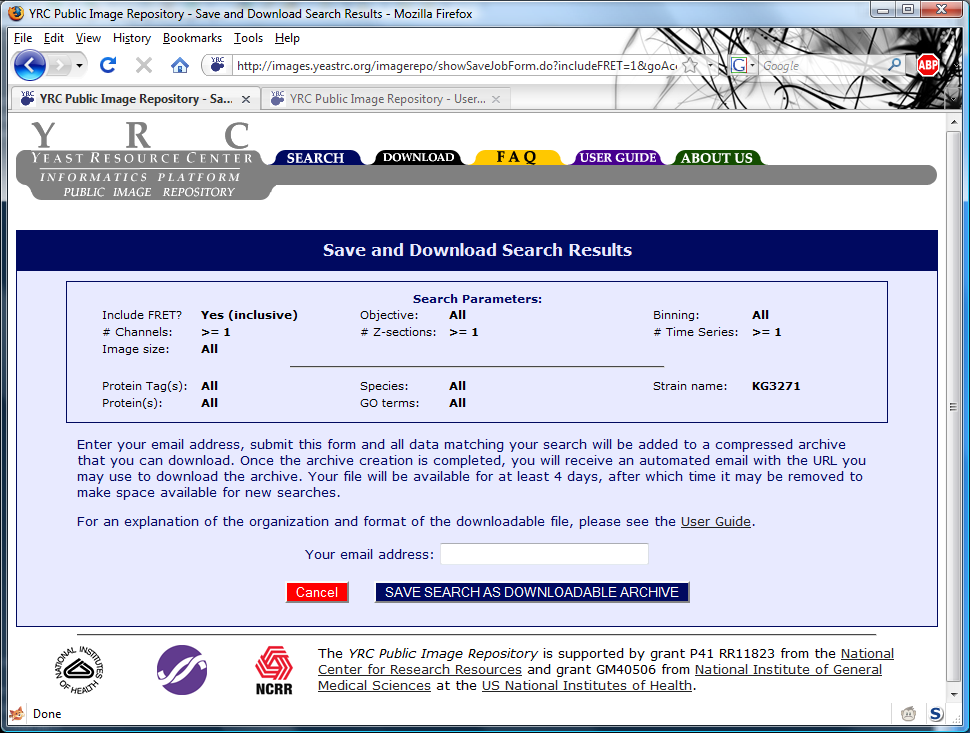
An screen shot of sample search results:


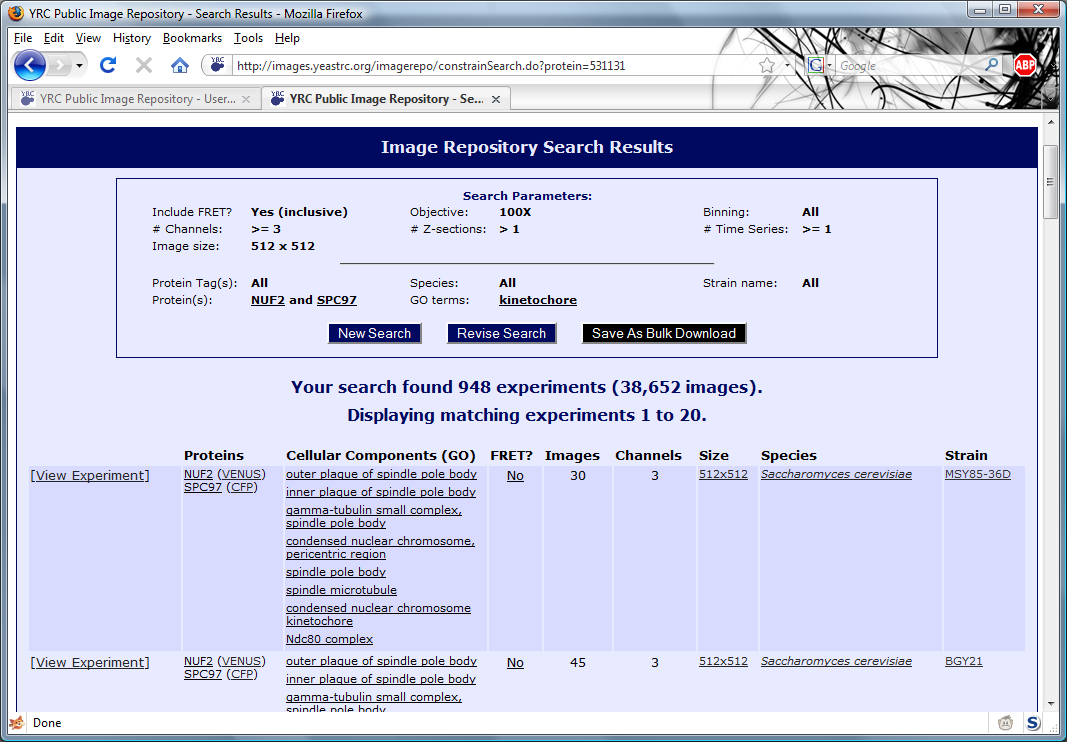
Listed in the box at the top are the search parameters corresponding to the listed search results. The "New Search" button will return the user to a default search form. The "Revise Search" button will return the user to the search form that is filled in with current search parameters. The "Save as Bulk Download" button allows the user to save all data matching the current search as a single downloadable archive. This is described in more detail in the "Downloading Data" section.

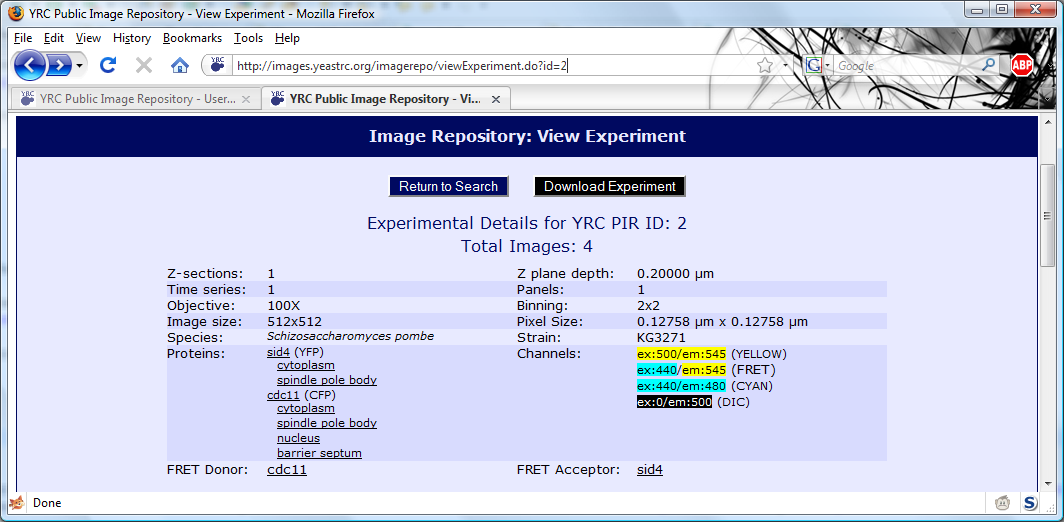
Following the search parameters list are the search results, themselves. They are listed 20 per page, and may be browsed by clicking "Previous 20 Results" or "Next 20 Results" at the bottom of 
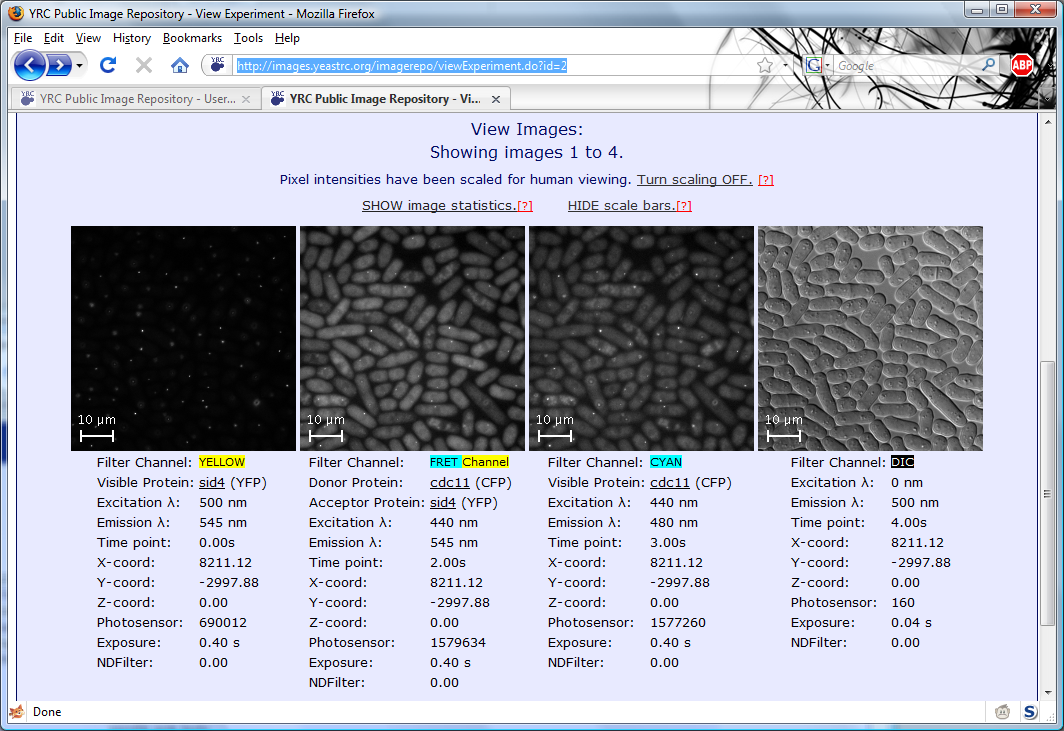
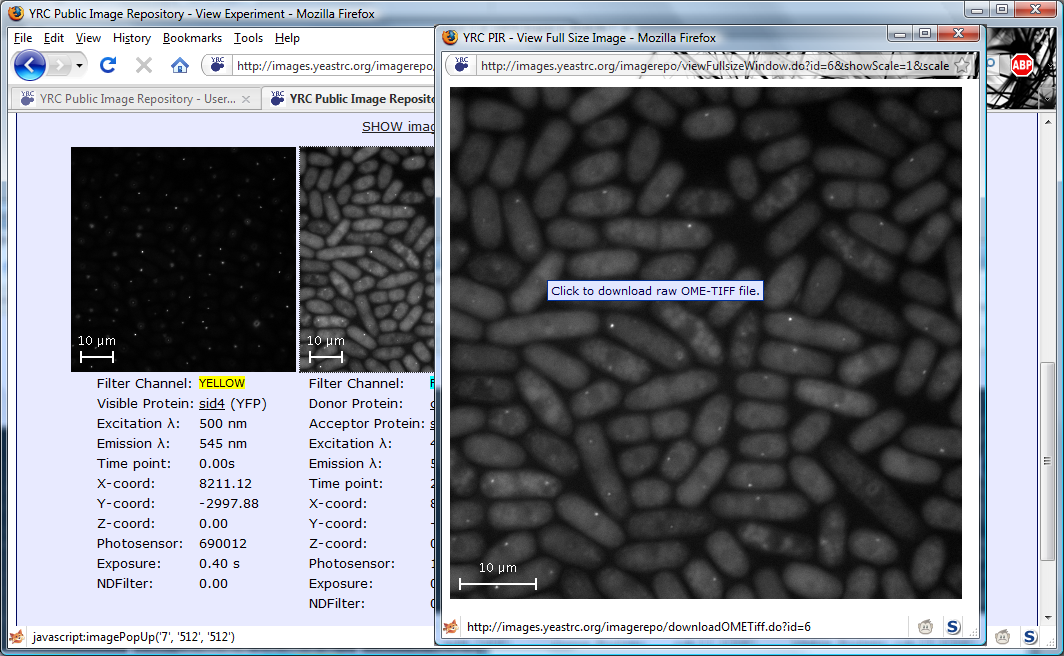
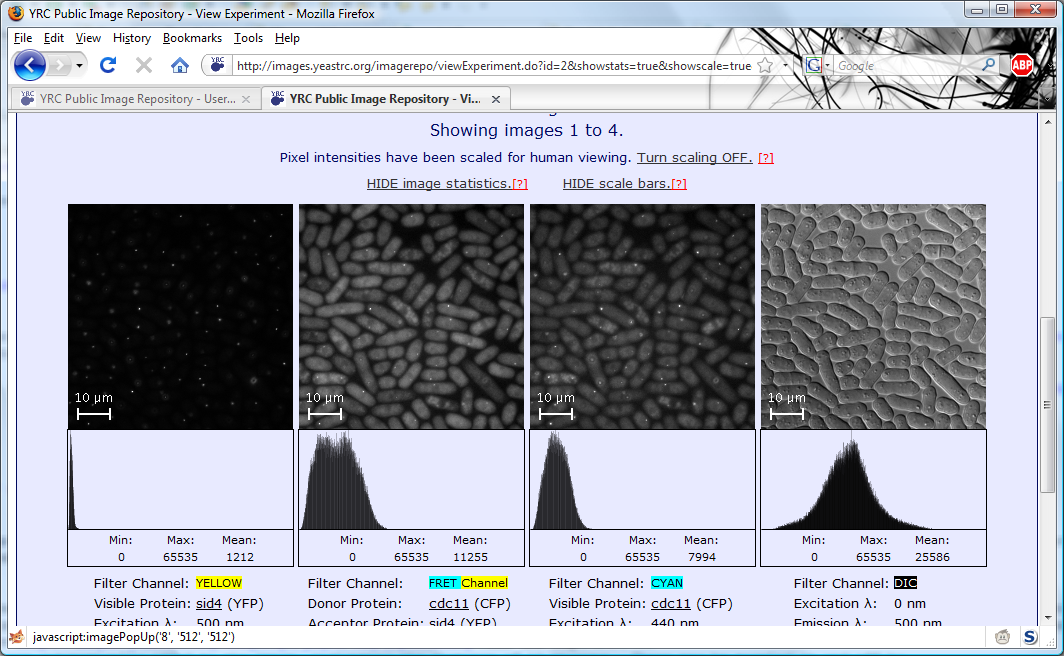
the search results. Clicking "[View Experiment]" will take the user to the experiment view page where images and metadata may be viewed. The columns contained in the search results are described in more detail in the FAQ.

C. Refining Your Search

In addition to clicking the "Revise Search" button under the search parameters, the links present in the search results may be used to refine the search. With the exception of proteins, GO terms and whether or not to include FRET experiments, simply clicking links present in the search results will add that constraint to your search. For example, clicking on "BGY21" in the "Strain" column in the example results above will add that constraint to the search and automatically research the database.

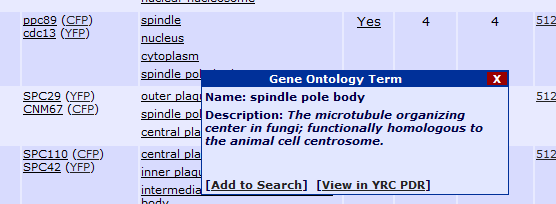
In the case of protein names and GO terms in the results, placing your mouse arrow over a protein or GO term will produce the following tool tips to appear:

GO term:


Protein:


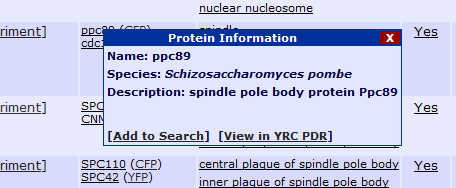
Clicking "Add to Search" will add this protein or GO term as a constraint to the current search. If the search already contains a protein, this protein will be added as a second protein and all results will need to contain both proteins. If the search already contains two proteins, this new protein will replace the second protein in the search constraints. Clicking "View in YRC PDR" will open a page from the YRC Public Data Repository containing more detailed information about the protein or GO term.

In the case of FRET, placing your mouse arrow over the FRET column yields the following tool tip:


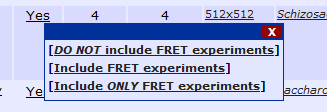
Clicking any of the links will add the corresponding constraint to the current search, replacing the current FRET constraint.


II. View Experiment

To view an experiment, click on the [View Experiment] link on the search results page. Additionally, direct links may be made to experiments in the YRC PIR, such as http://images.yeastrc.org/imagerepo/viewExperiment.do?id=2.

The experiment view page can be conceptually broken down into 2 main sections:

A. Experiment Metadata

Example:


Preceding the display of the metadata, a button named "Return to Search" is provided that will return the user to the search results page. Another button named "Download Experiment" allows the user to download all data and metadata associated with this experiment. This is described in more detail in the "Downloading Data" section below.

All metadata associated with the experiment are presented at the top of the page. These metadata are described in detail in the FAQ.

B. Image Data

Example:


The images contained in the project are displayed as thumbnails along with metadata associated with each image. For more information about the image metadata, see the FAQ. The images displayed on this page have been modified from their source images in several ways, all of which the user can disable.
  • Scaling - The intensity values of the pixels have been modified to maximize the "visibility" of the image. Microscopy images are typically very dim, and most would simply appear as black if not modified. This scaling effect can be toggled on and off by cliking the "Turn scaling OFF." or "Turn scaling ON." links above the images. For more information about scaling, see the FAQ.

  • Scale bars - By default, scale bars are automatically added to the image--indicating the distance of 10 microns. These may be toggled on and off by cliking the "HIDE scale bars." and "SHOW scale bars." links.

  • Resizing - Images on the experiment view page have been resized to fit 2, 3, 4 or 5 images per row (depending on the number of channels in the experiment). To view an image full size, simply click on the thumbnail.

  • Converted to PNG - Images displayed on the web site, including full size images, have been converted to PNG so that they will render in a web browser. To download an image as the raw, unmodified TIFF data, simply click on the image while viewing the full size version of the image.
Example of viewing full size image with OME TIFF download tool tip:


Basic image statistics may be toggled on and off by clicking the "SHOW image statistics." and "HIDE image statistics." links. The statistics include the minimum, mean and maximum pixel values contained in each image. A histogram is also provided showing the relative quantity of pixels with all values from 0 intensity to maximum intensity possible in a 16-bit image (65535). Note: The statistics will be affected by scaling. To view unscaled statistics, disable scaling view the "Turn scaling OFF." link.

An example of image statistics:


III. Downloading Data

A. Download All Data

The entire dataset contained in the YRC PIR, including image and experimental metadata, may be downloaded from the Download Page. The archive has been split into 10 separate files to assist in downloading the entire set. A description of the organization of the archive is given on the download page.

B. Download an Experiment

On the experiment view page for every experiment there is a black "Download Experiment" button near the top of the page. This button will trigger a download of the image and metadata associated with the currently-viewed experiment. The images in the download are in OME TIFF format. For more information regarding OME TIFF see the FAQ. The archive file is a tarred and gzipped file with the extension .tgz. The format of the archive is:
		YRCPIR_exEXP_ID/
			metadata.txt
			images/
				pPANEL_NUM_zSECTION_NUM_cCHANNEL_NUM_tSERIES_NUM.txt
				pPANEL_NUM_zSECTION_NUM_cCHANNEL_NUM_tSERIES_NUM.ome.tif
				... one set of these for every image in the experiment

		Where:
		EXP_ID = experiment ID number
		PANEL_NUM = panel number (starting at 0)
		SECTION_NUM = z section number (starting at 0)
		CHANNEL_NUM = channel number (starting at 0)
		SERIES_NUM = time series number (starting at 0)
		

C. Download an Image

As described above, a user may download the RAW TIFF data (as an OME TIFF) for any image by clicking on the full size version of the image from the experiment view page. First find the experiment of interest, then click on an image thumbnail to view full size, and finally click on the full size image to download the RAW TIFF data.

D. Custom-defined Bulk Download

At the top of the search results page there is a black button named "Save as Bulk Download". Clicking this button allows the user to save all data from all experiments matching their current search as a downloadable archive. The search and bulk download system essentially allows users to custom-define and download large subsets of the entire Image Repository database. Clicking the "Save as Bulk Download" leads to the following page:


The email address is required to notify the user when the preparation of their downloadable archive file is complete. This may take several hours, depending on the number of images matching the search. The email address is used for no other purpose. The email will contain a link to the downloadable archive file as well as the search parameters used to create the archive. The downloadable file is organized as:
		
		1/2/3/YRCPIR_ex123/
			metadata.txt
			images/
				YRCPIR_123_p0_z0_c0_t0.ome.tiff
				YRCPIR_123_p0_z0_c0_t0.txt
				YRCPIR_123_p0_z0_c1_t0.ome.tiff
				YRCPIR_123_p0_z0_c1_t0.txt
				YRCPIR_123_p0_z0_c2_t0.ome.tiff
				YRCPIR_123_p0_z0_c2_t0.txt
				YRCPIR_123_p0_z1_c0_t0.ome.tiff
				YRCPIR_123_p0_z1_c0_t0.txt
				YRCPIR_123_p0_z1_c1_t0.ome.tiff
				YRCPIR_123_p0_z1_c1_t0.txt
				YRCPIR_123_p0_z1_c2_t0.ome.tiff
				YRCPIR_123_p0_z1_c2_t0.txt
				YRCPIR_123_p0_z2_c0_t0.ome.tiff
				YRCPIR_123_p0_z2_c0_t0.txt
				YRCPIR_123_p0_z2_c1_t0.ome.tiff
				YRCPIR_123_p0_z2_c1_t0.txt
				YRCPIR_123_p0_z2_c2_t0.ome.tiff
				YRCPIR_123_p0_z2_c2_t0.txt
		3/9/7/YRCPIR_ex13397/
			metadata.txt
			images/
				YRCPIR_13397_p0_z0_c0_t0.ome.tiff
				YRCPIR_13397_p0_z0_c0_t0.txt
				YRCPIR_13397_p0_z0_c1_t0.ome.tiff
				YRCPIR_13397_p0_z0_c1_t0.txt
				YRCPIR_13397_p0_z0_c2_t0.ome.tiff
				YRCPIR_13397_p0_z0_c2_t0.txt
		
The data is organized according to the experiment ID number of each experiment. Each experiment will be located in the sub directory corresponding to the last 3 digits of its ID number. For example, experiment number 388349 will be found in the "3/4/9/YRCPIR_ex388349" directory. This was done to limit the number of files contained in a single directory and improve I/O performance. Each experiment subdirectory contains the following files and directories:
  • metadata.txt - Contains the metadata for the experiment in a human-readable text file. This is also suitable for automatic parsing.
  • images/ - Contains images and image metadata
  • images/YRCPIR_123_p0_z0_c0_t0.ome.tiff - For experiment number 123 this is the image corresponding to the first panel (p0), first z-section (z0), first channel (c0) and first time point (t0). The image is a raw 16-bit OME TIFF image.
  • images/YRCPIR_123_p0_z0_c0_t0.txt - Contains the metadata for the above image in a human-readable text file. This is also suitable for automatic parsing.
  • images/YRCPIR_123_p0_z0_c1_t0.ome.tiff - For experiment number 123 this is the image corresponding to the first panel (p0), first z-section (z0), second channel (c1) and first time point (t0). The image is a raw 16-bit OME TIFF image.
  • images/YRCPIR_123_p0_z0_c1_t0.txt - Contains the metadata for the above image in a human-readable text file. This is also suitable for automatic parsing.
  • Such pairs exist for every image in the experiment.
The archive has been tarred and gzipped and may be uncompressed as follows:
  • Linux or Mac OS X - Copy file to desired location. Execute tar -xzf filename.tar.gz to uncompress and untar the archive.
  • Windows - WinZip supports this format of file. However, testing of WinZip on very large archives is untested by us. Gzip and Tar may be downloaded as tools for windows and will work to uncompress and untar the file.
  • Mac OS X - Additionally, Mac users may use Stuffit Expander to open the archives.

UW
The YRC Public Image Repository is supported by grants P41GM103533 and GM40506 from National Institute of General Medical Sciences at the US National Institutes of Health.